Aug 30, 2023
Hugo
David
Today, in How to Automate, we will learn how a Mindflow user can automatically monitor and manage Google OAuth registration tokens through the platform.
As the organization's information systems get increasingly splattered across different devices - laptops, Macs, PCs, iPhones, Androids, iPads, etc.- it can be challenging to keep track of who has access to what. In this regard, organizations are turning to solutions that provide services to help them monitor the access granted. Of course, these solutions come with a price that not all organizations can afford.
Interestingly, with the increasing usage of collaborative workspaces such as Microsoft 365 or Google Workspace, the resources employees try to access from their different devices are centralized in a single suite. To access these resources to different devices, they grant authorization through their accounts, most likely by generating a Microsoft or Google OAuth registration token with the requested permissions, depending on the suite the organization uses.
Even more interesting is that these OAuth tokens are logged on your workspace admin panel so the admin can monitor who granted access to what resources for which application (Mail, Calendar, Notion, Slack, etc.).
For the admin, it is a way to enforce the organization's policy that forbids access to its resources from noncompliant devices without resorting to a Mobile Device Management (MDM). Of course, doing this manually can be cumbersome, as suites such as Microsoft or Google are also used as Identity Providers on a myriad of third-party tools. Thus, Microsoft or Google OAuth registration events are logged hundreds by hundreds every day.
This is where automation comes into force, and today's How to Automate begins. We will only need to orchestrate 3 APIs: Google Admin Reports, Google Admin Directory, and Slack for notification.
Monitor and manage Google OAuth registration tokens with Mindflow - First steps.
In this guide, we will take the use case of an organization using Google Workspace that wants to restrict access to its resources from mobile devices. To do so, we will create Google OAuth registration token events to monitor and manage flows targeting tokens that grant access to iOS and Android devices. It is relatively easy to change the app you are targeting to adapt this use case to any other application you deem noncompliant with your organization's policy (browsers, chat, or other specific apps).
First, we must ensure we have the proper credentials and permissions to retrieve the events logged. On the Google Cloud console, select your project, search for Admin SDK API, and make sure the Admin SDK API is enabled. Then ensure that your service account, in Domain Wide Access delegation in the Google Admin space, has the scope https://www.googleapis.com/auth/admin.reports.audit.readonly.
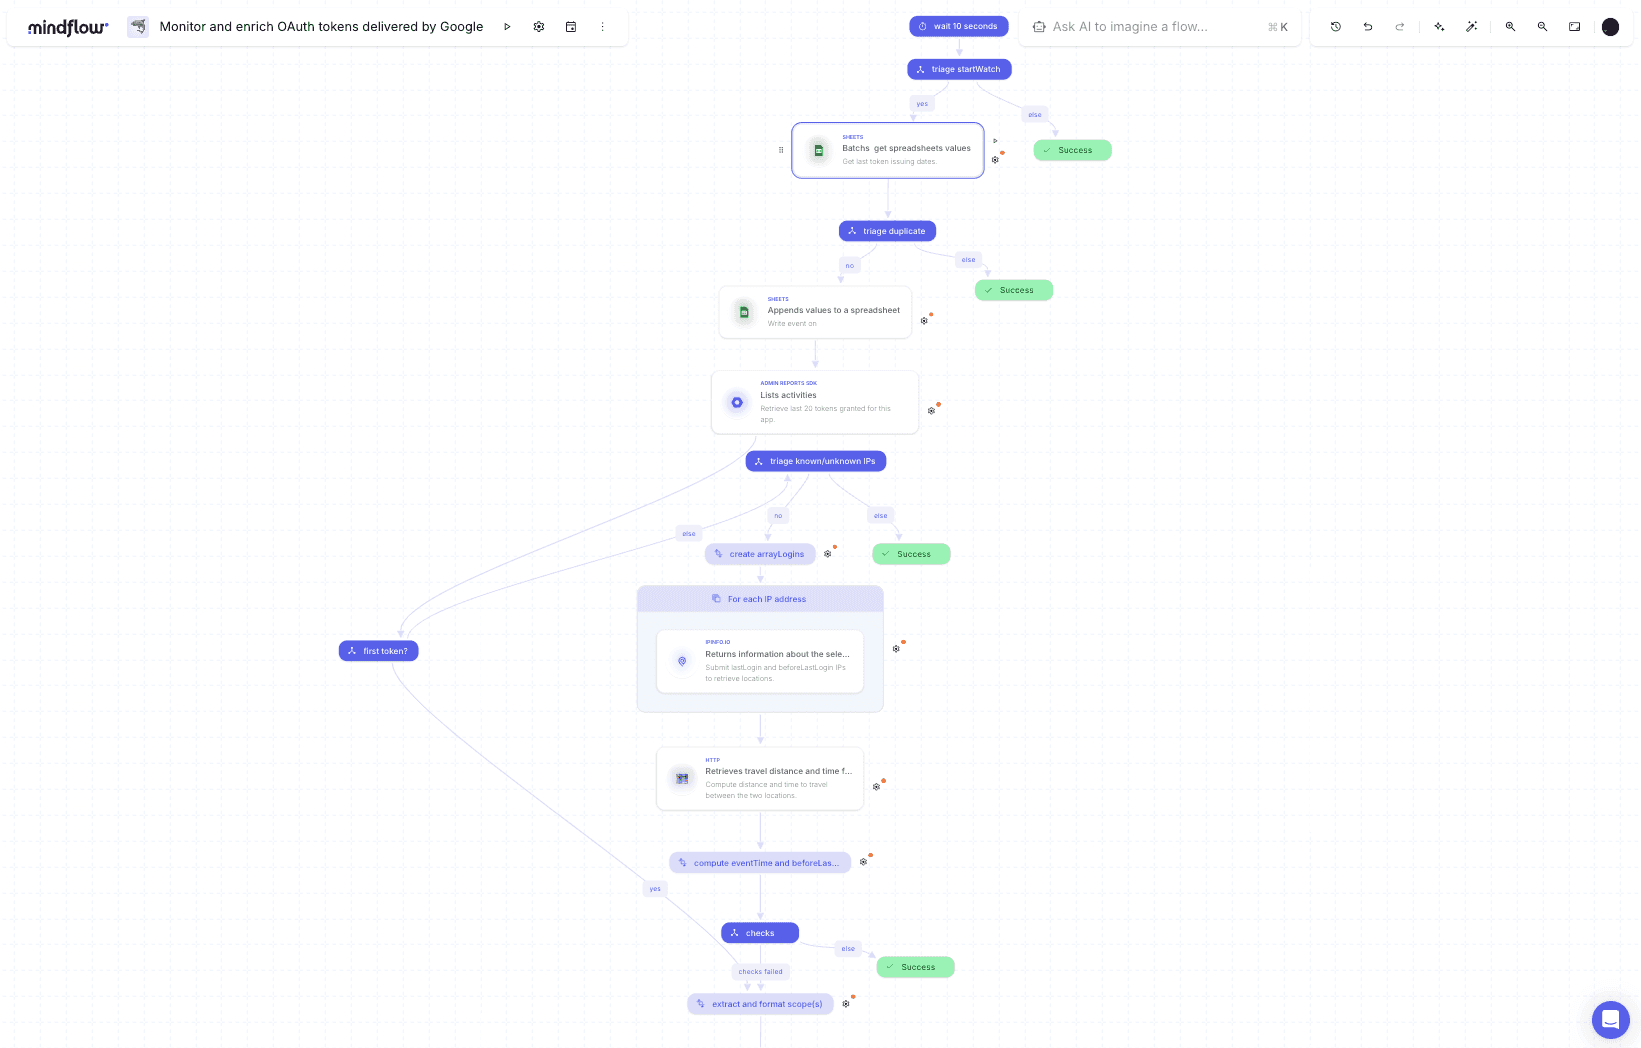
Then, on Mindflow, ensure the service account credentials you registered have the same scope included. Before starting, let's look at the final flow.
Now, we want to create a channel between Google and Mindflow in which notifications will flow to the targeted playbook. To do so, create a new playbook on the platform that you will name "Watch OAuth registration tokens events." Then, please choose your favorite emoji, and let's get started.
This first flow is pretty thorough. Click right to create a new step and, in the Finder, reports.activities.watch or Watchs activities to find and create two steps. Select your Google credential in the SETTINGS panel. Open the configuration panel by clicking the gear icon at the bottom right of the step. Now, click the ADVANCED icon on the top right of the step configuration pop-over. Configure the fields as such:
User key:
all(we will watch activities from all users)Application name:
tokenAddress: This is the second playbook's webhook that will receive information from the channel we will create later. Leave it empty for now.
Type:
web_hookFilters:
app_name==iOSId: Create your channel name, such as
OAuthTokeniOSEvent name:
authorize.
Create a new step and repeat the same process except for the following fields:
Filters:
app_name==AndroidId:
OAuthTokenAndroid
Now, back to the main page. Create a new flow, naming it "Revoke noncompliant Google OAuth tokens." Click the gear and copy icons on the second URL starting from the bottom. This is the webhook address you will paste in the first flow. Go back to Watch OAuth registration tokens events, open the reports.activities.watch steps and paste this address in the field "Address" for both steps.
Run the two steps to generate logs. Once done, open each to consult the execution logs. What we want is to find resourceId and resourceUri. We will use them to create two new steps before the Watches. Open the Finder and type either admin.channels.stop or Stop watching resources through this channel. Create two admin.channels.stop steps. Select your credential in the SETTINGS panel. In each, fill in the fields as such:
Address: the webhook URL you pasted in the first steps
Id: the two Ids you typed in the first steps. Copy and paste them in the relevant admin.channels.stop steps
Type:
web_hookResource Uri: Copy and paste the relevant
resourceUriin the two stepsResource Id: Copy and paste one
resourceIdfrom either steps, they are the same
When executed, this flow will stop the Watch activity on the two channels we created and then Start a new watch. We do this Stop and Watch because Google won't allow two concurrent Watch on the same Channel Id. You can run the entire flow once to see if everything checks green.
The first flow is almost done. We only need to set up the scheduler. Click the calendar icon right next to the flow's title. Select "At regular intervals", "Daily," and select 0, 4, 8, 12, 16, 20 for hours and 01 for minutes, then click Save. This flow will be triggered every 4 hours. The first steps are done!
Monitor and manage Google OAuth registration tokens with Mindflow - Create the automated token revocation.
Open the Revoke noncompliant Google OAuth tokens flow again. Considering the amount of Google OAuth registration events generated daily, this flow will likely be triggered, and you will have all the logs necessary to build the flow! Let's have a look at the final configuration before we begin.
Start by creating a condition named is app_name==iOS||Android? Create a branch that leads to the directory.tokens.delete / Deletes all access tokens issued by a user for an application step and name it Yes.
Create a second branch that leads to a Success step. Open the condition configuration panel, click the three dots on the left of the branch leading to Success, and select "Use as else."
Back to the branch panel. Click the Yes branch and, in the first field, type ["iOS","Android"]. Select the operator "Is equal to". In the second field, open the Data Picker Tool with "/" and select the APIs-Google log-in TRIGGERS. Open the log and navigate to body/value/events/events[0]/parameters/parameters[1] and select the object value.

Your condition is configured. On to the directory.tokens.delete step. Make sure the Google credentials are filled in the SETTINGS panel. In the INPUT panel, fill in the two fields as such:
Client id: open the same Google log and navigate to body/value/events/events[0]/parameters/parameters[0] to pick the object
value.User key: navigate to body/value/actor and pick the object
email.
The final step in this flow! Create a Slack chat_postMessage / Sends a message to a channel step. Fill in the correct credentials (make sure you have the Channel:write scope granted) and the Channel you want the message to be posted to. In "Text," write the message you want to be published to notify the team that a Google OAuth has been revoked. You can also add some contextualization by invoking data such as:
User in cause: body/value/actor and the object
emailApp name: body/value/events/events[0]/parameters/parameters[1] and pick
value.Scope(s): body/value/events/events[0]/parameters/parameters[4] and pick
multiValue.
Deploy the flow, and you are set. Congrats!